Specialized in the production and supply of a full range of aluminum profiles and metal fabrication
sheet metal riveting process
📑 Table of Contents
- 📄 Overview of the Sheet Metal Riveting Process
- 📄 Types of Rivets Used in Sheet Metal Riveting
- 📄 Step-by-Step Sheet Metal Riveting Process
- └ 📌 Step 1: Material Preparation and Hole Drilling
- └ 📌 Step 2: Rivet Insertion
- └ 📌 Step 3: Deformation (Upsetting or Pulling)
- └ 📌 Step 4: Inspection and Finishing
- 📄 Tools and Equipment for Sheet Metal Riveting
- 📄 Common Challenges in Sheet Metal Riveting
- 📄 Best Practices for Optimal Rivet Joints
- 📄 FAQ
- └ 📌 1. What is the difference between a blind rivet and a solid rivet?
- └ 📌 2. How do I choose the correct rivet size for sheet metal?
- └ 📌 3. Can I rivet different metals together?
- └ 📌 4. What causes a rivet joint to fail?
- └ 📌 5. Is riveting stronger than welding?
- └ 📌 6. What is the maximum thickness of sheet metal that can be riveted?
- └ 📌 7. How do I remove a rivet?
- └ 📌 8. What is the difference between a rivet and a screw?
- └ 📌 9. Can I use a rivet for a leak-proof joint?
- └ 📌 10. What safety precautions should I take when riveting?
- 📄 Contact the manufacturer
Overview of the Sheet Metal Riveting Process
The sheet metal riveting process is a fundamental technique in manufacturing and construction, used to permanently join two or more metal sheets. Unlike welding or adhesive bonding, riveting relies on mechanical deformation to create a strong, durable joint. This process is widely applied in aerospace, automotive, HVAC, and electronics industries due to its reliability, resistance to vibration, and ability to join dissimilar metals. The process typically involves drilling or punching holes through the sheets, inserting a rivet, and then deforming the rivet’s tail to form a second head, securing the materials together. Understanding the nuances of rivet types, tools, and techniques is critical for achieving high-strength, leak-proof, and aesthetically pleasing joints. The following sections explore key aspects of sheet metal riveting, including types of rivets, step-by-step procedures, tool selection, common challenges, and best practices.
Types of Rivets Used in Sheet Metal Riveting
Selecting the correct rivet type is crucial for the integrity of the joint. Rivets come in various materials, head styles, and installation methods. Below is a comparative table of common rivet types used in sheet metal applications.
| Rivet Type | Material | Head Style | Typical Application | Strength Characteristics |
|---|---|---|---|---|
| Solid Rivet | Aluminum, Steel, Copper | Round, Countersunk | Aerospace, Heavy machinery | High shear and tensile strength |
| Blind Rivet (Pop Rivet) | Aluminum, Stainless Steel | Dome, Large Flange | Automotive, HVAC, DIY | Moderate strength, easy installation |
| Self-Piercing Rivet | Steel, Aluminum | Flush, Semi-tubular | Automotive body panels | High fatigue resistance |
| Drive Rivet | Aluminum, Steel | Flat, Truss | Signage, Light fixtures | Low to moderate strength |
| Structural Rivet | High-strength Steel | Large flange | Bridge, Building construction | Very high load capacity |
Solid Rivets
Solid rivets are the oldest and most robust type, consisting of a solid shaft with a pre-formed head. They require access to both sides of the workpiece for installation, typically using a rivet gun or hammer. Solid rivets provide excellent shear and tensile strength, making them ideal for critical structural applications like aircraft frames and bridges. The installation process involves heating the rivet (in some cases) and then upsetting the tail to form a second head. While labor-intensive, the resulting joint is extremely reliable and resistant to fatigue.
Blind Rivets (Pop Rivets)
Blind rivets are designed for applications where only one side of the workpiece is accessible. They consist of a hollow body and a mandrel. When the rivet gun pulls the mandrel, it expands the body and breaks off the mandrel, creating a secure joint. Blind rivets are popular in automotive, HVAC, and consumer goods due to their ease of use and speed. However, they generally have lower strength than solid rivets and are not recommended for high-stress structural applications. Variations like sealed blind rivets are used for leak-proof joints in fluid systems.
Step-by-Step Sheet Metal Riveting Process
Mastering the riveting process ensures consistent, high-quality joints. Below is a detailed breakdown of the steps involved in manual and pneumatic riveting.
Step 1: Material Preparation and Hole Drilling
Begin by cleaning the sheet metal surfaces to remove oil, dirt, or oxidation. Proper alignment of the sheets is critical; use clamps or jigs to hold them together. Drill holes slightly larger than the rivet diameter (typically 1.5 to 2 mm larger for clearance). The hole should be perpendicular to the surface to avoid angled rivets. For thin sheets, use a backing plate to prevent deformation. Countersinking may be required for flush rivets in aerodynamic or aesthetic applications.
Step 2: Rivet Insertion
Select the correct rivet length and diameter based on the total thickness of the sheets (grip range). Insert the rivet into the hole from the accessible side. For blind rivets, ensure the mandrel is fully seated in the rivet gun. For solid rivets, the rivet should protrude through the hole by approximately 1.5 times its diameter to form a proper shop head. Avoid forcing the rivet if it does not fit smoothly, as this may damage the hole or the rivet.
Step 3: Deformation (Upsetting or Pulling)
For solid rivets, use a rivet gun with a bucking bar on the opposite side to form the second head. Apply consistent pressure to avoid cracking or mushrooming. For blind rivets, activate the rivet gun to pull the mandrel until it breaks. The body expands and clamps the sheets together. Ensure the rivet gun is perpendicular to the work surface to prevent a crooked joint. For self-piercing rivets, the process combines punching and riveting in one stroke, eliminating the need for pre-drilled holes.
Step 4: Inspection and Finishing
After riveting, inspect the joint for proper head formation, gap closure, and alignment. The shop head should be uniform and free of cracks. For countersunk rivets, the head should be flush with the surface. Use a feeler gauge to check for gaps between sheets. Remove any burrs or sharp edges with a file or deburring tool. In critical applications, perform a pull test or ultrasonic inspection to verify joint integrity.
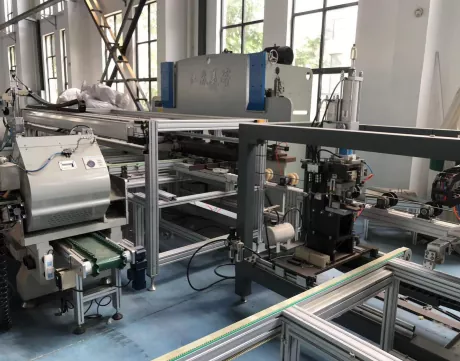
Tools and Equipment for Sheet Metal Riveting
Choosing the right tools enhances efficiency and joint quality. Below is a table comparing common riveting tools.
| Tool | Type | Power Source | Best For | Advantages |
|---|---|---|---|---|
| Hand Rivet Gun | Manual | Manual force | Small projects, DIY | Low cost, portable |
| Pneumatic Rivet Gun | Pneumatic | Compressed air | High-volume production | Fast, consistent, less fatigue |
| Battery-Powered Rivet Gun | Electric | Rechargeable battery | Field work, remote areas | No air hose, easy to use |
| Hydraulic Riveter | Hydraulic | Hydraulic pump | Large structural rivets | High force, precise control |
| Rivet Nut Tool | Manual/Pneumatic | Manual or air | Threaded inserts in sheet metal | Adds threads to thin metal |
Hand Rivet Guns
Hand rivet guns are the most basic tool, suitable for low-volume work and repairs. They require significant manual effort, especially for larger rivets, but are inexpensive and do not need external power. They are ideal for hobbyists and small workshops. However, for repetitive tasks, they can cause hand fatigue and inconsistent results.
Pneumatic Rivet Guns
Pneumatic rivet guns are the industry standard for production environments. They use compressed air to deliver rapid, consistent pulling force, reducing operator fatigue and increasing throughput. They are available in different sizes for various rivet diameters. Proper maintenance, including lubrication and air filter cleaning, is essential for longevity. They are not portable without an air compressor.
Common Challenges in Sheet Metal Riveting
Even experienced technicians face issues during riveting. Understanding these challenges helps prevent defects.
Rivet Buckling or Bending
Rivet buckling occurs when the rivet is too long for the grip range or when the hole is misaligned. This results in a weak joint and poor appearance. To avoid this, always measure the total sheet thickness and select a rivet with the correct grip range. Ensure holes are aligned using clamps or fixtures. If buckling occurs, remove the rivet and re-drill if necessary.
Gaps Between Sheets
Gaps between the joined sheets indicate insufficient clamping force or incorrect rivet selection. This can lead to vibration, corrosion, and reduced strength. Use a rivet with a larger head diameter or increase the number of rivets. Ensure the rivet gun applies enough force to compress the sheets. For blind rivets, check that the mandrel breaks at the correct tension.
Head Cracking or Splitting
Head cracking is often caused by using a rivet that is too hard for the material or by excessive force during upsetting. This weakens the joint and can lead to failure. Use rivets made of ductile materials like aluminum for softer sheets. Adjust the rivet gun pressure or use a softer bucking bar. In some cases, pre-heating the rivet can reduce cracking risk.
Best Practices for Optimal Rivet Joints
Following established best practices ensures long-lasting, reliable joints.
Grip Range and Hole Size
Always match the rivet grip range to the total thickness of the sheets. The hole diameter should be 1.5 to 2 mm larger than the rivet shank for clearance. For structural applications, use a tighter tolerance. Test on scrap material before production to verify fit.
Rivet Spacing and Edge Distance
Proper spacing prevents sheet distortion and ensures load distribution. As a rule, the distance between rivets should be at least 3 times the rivet diameter, and the edge distance (from the rivet center to the sheet edge) should be at least 1.5 times the rivet diameter. Closer spacing may cause tearing, while wider spacing reduces joint strength.
Surface Preparation
Clean surfaces improve joint integrity and prevent corrosion. Remove oil, grease, and rust using solvents or abrasives. For outdoor applications, consider using sealant or coated rivets to prevent galvanic corrosion between dissimilar metals. Apply a primer or paint after riveting for additional protection.
FAQ
1. What is the difference between a blind rivet and a solid rivet?
A blind rivet, also known as a pop rivet, is installed from one side of the workpiece, making it ideal for applications with limited access. It consists of a hollow body and a mandrel that is pulled to expand the body and then breaks off. Solid rivets, on the other hand, require access to both sides and are hammered or pressed to form a second head. Solid rivets offer higher shear and tensile strength and are used in critical structural applications like aircraft and bridges. Blind rivets are faster to install but generally have lower strength and are not recommended for high-stress joints. The choice depends on accessibility, strength requirements, and production volume.
2. How do I choose the correct rivet size for sheet metal?
Choosing the correct rivet size involves measuring the total thickness of the sheets to be joined (grip range) and selecting a rivet with a grip range that covers that thickness. The rivet diameter should be approximately 1.5 to 2 times the thickness of the thickest sheet. For example, for 2 mm thick sheets, a 3-4 mm diameter rivet is typical. The hole diameter should be 1.5 to 2 mm larger than the rivet shank. Also consider the material: aluminum rivets for aluminum sheets, steel for steel, and stainless steel for corrosion resistance. Always refer to the manufacturer’s specifications for grip range and recommended hole sizes.
3. Can I rivet different metals together?
Yes, riveting is an excellent method for joining dissimilar metals because it does not involve melting or fusing the materials, which can cause metallurgical issues like galvanic corrosion. However, precautions are necessary. Use rivets made of a compatible material or a neutral material like aluminum or stainless steel. Apply a sealant or insulating layer between the sheets to prevent galvanic corrosion, especially in outdoor or moist environments. For example, when joining aluminum to steel, use aluminum or stainless steel rivets and a corrosion-inhibiting primer. The mechanical joint remains strong, but long-term corrosion resistance depends on proper material selection and protection.
4. What causes a rivet joint to fail?
Rivet joint failure can result from several factors: incorrect rivet size (too short or too long), improper hole alignment, excessive or insufficient force during installation, material fatigue, or corrosion. A rivet that is too short may not form a proper shop head, while one that is too long can buckle. Misaligned holes cause uneven stress and gaps. Excessive force can crack the rivet head, while insufficient force leaves the joint loose. Over time, vibration can loosen the joint, and corrosion can weaken the rivet or sheet material. Regular inspection and adherence to best practices minimize failure risk.
5. Is riveting stronger than welding?
Riveting and welding have different strength characteristics. Welding creates a continuous bond that can be as strong as the base metal, but it introduces heat-affected zones that may weaken the material. Riveting creates a mechanical joint that distributes load across multiple points, offering excellent fatigue resistance and vibration damping. In many applications, such as aircraft construction, riveting is preferred because it does not weaken the surrounding metal and allows for easier inspection and repair. However, for high-strength, leak-proof joints in thick materials, welding may be stronger. The choice depends on the specific application, material, and design requirements.
6. What is the maximum thickness of sheet metal that can be riveted?
The maximum thickness depends on the rivet type, size, and tooling. Solid rivets can join sheets up to 25 mm or more, but this requires heavy-duty hydraulic or pneumatic tools. Blind rivets are typically used for sheets up to 6-8 mm thick, with special long-grip rivets available for thicker stacks. Self-piercing rivets can handle up to 6 mm total thickness. For very thick materials, bolting or welding may be more practical. Always check the rivet manufacturer’s grip range specifications. For most industrial applications, riveting is efficient for sheets up to 12 mm thick.
7. How do I remove a rivet?
To remove a rivet, you need to drill out the head. Use a drill bit slightly smaller than the rivet shank (not the head). Center punch the rivet head to prevent the drill from wandering. Drill into the head until it separates from the shank. Then, use a punch to push the remaining shank out of the hole. For blind rivets, you may need to drill through the entire body. Be careful not to enlarge the hole in the sheet metal. After removal, deburr the hole and inspect for damage. If the hole is damaged, you may need to use a larger rivet or a rivet nut for repair.
8. What is the difference between a rivet and a screw?
Rivets and screws both join materials, but they differ in installation and permanence. A rivet is a permanent mechanical fastener that is deformed to hold materials together; it cannot be removed without destroying it. A screw is a threaded fastener that can be easily installed and removed with a screwdriver or wrench, allowing for disassembly and reuse. Rivets provide a more vibration-resistant joint and are often used in applications where tampering is undesirable. Screws are better for applications requiring maintenance or adjustments. Rivets also do not require tapping threads, making them faster for high-volume assembly.
9. Can I use a rivet for a leak-proof joint?
Yes, but you need to use specific types of rivets and techniques. Sealed blind rivets have a closed end or a sealant inside the body that prevents fluid or gas leakage. Solid rivets can be used with a sealant applied to the shank before insertion. Additionally, using a rivet with a large flange or a countersunk head with a sealing compound can improve leak resistance. For critical applications like fuel tanks or hydraulic systems, ensure the rivet is properly installed and test the joint under pressure. Regular rivets without sealing features will leak.
10. What safety precautions should I take when riveting?
Safety is paramount during riveting. Always wear safety glasses to protect against flying metal chips and broken mandrels. Use hearing protection when using pneumatic or hydraulic rivet guns, as they can be loud. Gloves protect against sharp edges and hot rivets (if heating is used). Ensure the work area is clean and free of tripping hazards. When using pneumatic tools, check air hoses for damage and secure connections. Never place fingers between the rivet gun and the workpiece. For large or heavy sheets, use lifting equipment to avoid strain. Follow the tool manufacturer’s instructions and maintain equipment regularly.
Contact the manufacturer
Email: cnaluprofile@163.com
Phone: +86-13651855050